One of the trouble spots with my RV home automation system has been the MQTT server. I know that should be a fairly simple component, but it seems that fairly frequently things will stop working, and the problem is that the MQTT server hung up, or rebooted and didn’t fully restart. I’m currently using an old Mac Mini mounted under my desk, and that’s the problem. Even after experimenting with settings and configuration, I continue to have problems. So I considered and prototyped a couple other options, but each had its own problems. So now I have switch to using a dedicated Raspberry Pi.
Let me clarify that I think that MQTT running on a Mac Mini is awesome, and a very good addition to a home automation system. It’s just that for my RV home automation where the power is constantly being turned on and off as I travel, it tends to be problematic. I’m hoping that a dedicated Raspberry Pi running off the 12 volt system, and doing nothing but running an MQTT broker will be much more robust.
With my recently upgraded cellular modem setup, my internet is pretty reliable and works even when I’m moving down the road. I depend on having a consistent internet connection in order to use Alexa. I’m going to power the Raspberry Pi with a 12v to 5v converter, so the MQTT broker should be always available.
Particle.io Cloud Limits
I would have loved to be able to just switch to using the particle.io cloud for all MQTT messaging, but the number of message permitted on the free plan is only 100k messages per month, which averages out to about 2 messages per minute across all devices. This isn’t enough because I also write timestamp, synchronization, and diagnostic logging messages over MQTT which can greatly exceed this.
Cloud MQTT
I looked at several cloud based MQTT brokers, and most would have some sort of small monthly fee associated with it. These include HiveMQ, Adafruit.io, and Google IoT. But using these didn’t really reduce the complexity of the system, which was a big reason for even exploring this.
Raspberry Pi Zero W
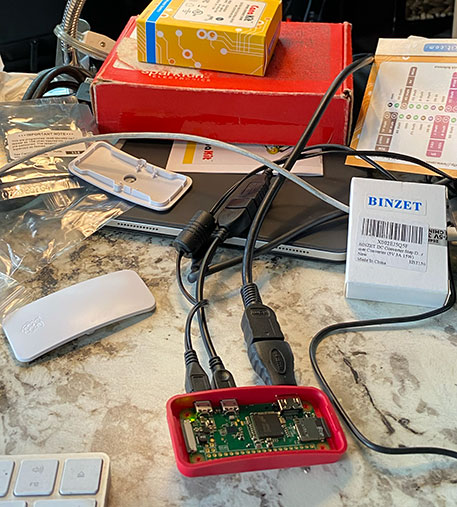
So I decided on using a Raspberry Pi Zero W, and ordered a CanaKit and a 12v to 5v converter for $45 off Amazon. This came with everything I needed, some of which won’t be used once all the software is loaded and configured.
Rapsberry Pi Zero W configured with Mosquitto MQTT broker
So after some simple configuration of the included NOOBs operating system included on the 16 gig SD card, I installed Mosquitto and now have a full-time, dedicated MQTT broker for under $50.
After spending a full month on the road in the RV, and returning home to a broken park internet, it because clear that we needed a more robust internet solution.
Our Current Setup
For this trip we had been using:
Verizon 75G phone plans on both our iPhones (each with 30 GB hotspot)
Verizon Jetpack 15 GB hotspot as backup
AT&T 100G plan on an old iPhone 6 (with 30 GB hotspot)
Sprint/T-Mobile LinkZone 2 unlimited hotspot.
This provided us with a lot of data on multiple carriers, but was pretty labor intensive selecting which device(s) worked, monitoring the bandwidth, switching as we moved, etc. We also had to be very careful to not burn through all our data when watching TV, movies, etc. Since we had a lot more data available on our phone than via hotspot, we tried connecting our TV to the phones as an external display, but this made for a very frustrating experience. We ended up needing to reconnect and/or restart frequently, not to mention getting tangled up in the HDMI and power cables strung across the room.
New Hardware
So after doing a lot of research when we got home, I came to the conclusion that the absolute best solution for working remotely, full time RVers like us would be the MobileMustHave.com Ultimate Road Warrier package. This package includes a Pepwave Transit Duo mobile router and a Parsec 7-in-1 roof antenna. It is one of the most expensive packages, at around $1,500, but has an amazing set of capabilities.
The mobile router has 2 cellular receivers built in, with 2 SIM slots each (4 SIM slots total). This allows automatically selecting the carrier that works best, and failing over to another carrier when one isn’t working. It can also do some really fancy things like ‘bonding’ both receivers to double the cellular bandwidth for a single connection.
Best of all, a lot of things can be configured to happen automatically, such as limiting each SIM to a specified bandwidth and data cap, then rolling over to the next SIM. And the status, bandwidth, and data usage can be reviewed and modified in one place.
Both are 12v powered, so the entire setup will continue to work either parked or while moving down the road.
I can’t even begin to describe all that this setup can do, so I’ll just refer you to the MobileMustHave website. They have a lot of videos there and on their Youtube channel.
Data Plans
So having picked a dual cellular mobile router, I’d need a couple hotspot data plan SIMs. Searching for high capacity data plans took a lot of investigation also. The information available from the Mobile Internet Resource Center as well as MobileMustHave.com was very helpful, and helped steer me away from some “too good to be true” plans. I want fairly reliable plans so I don’t have to spend a lot of time interacting with support when the plans just stop working.
During our travels, both Verizon and AT&T had very good coverage. My Sprint/T-Mobile hotspot didn’t do as well. I believe their coverage is better up north, but this past trip was across the south. So I was leaning towards Verizon and AT&T.
Since we already have Verizon plans for our phones, a good choice for us is the hotspot add-on to our plans. For $15 we could get a separate 30 GB hotspot SIM. We had previously added a Jetpack on an older plan that gave us 15 GB for $10/month. So I upgraded it to the 30 GB for $15/month plan, and added a second one for our other line. So that gave me two SIMs providing 30 GB each.
I really wanted AT&T plans for the other 2 slots. At first look, the AT&T plans were quite expensive, and didn’t provide a lot of data. But then I came across their Prepaid plans. Wow. They offer 100 GB prepaid hotspot plans for $55/month. So I got two of those also.
So now I have 2 x 100 GB AT&T for my primary carrier, with 2 x 30 GB Verizon backup/rollover. These can both be configured using Peplink SpeedFusion to provide double the bandwidth if/when needed. I’ll be checking into that later, but for now I think my cellular capability is good.
Controlling Data Usage
As I mentioned above, one of the frustrating aspects of using cellular data is having to monitor our usage, and adjust things to avoid running out of data. The Pepwave router makes this very easy. It has provisions for monitoring usage, throttling bandwidth on a per device or user group basis, and turning off or rolling over to another service when a threshold is reached.
I’ve been experimenting with the amount of bandwidth needed for our TV, and have been surprised. Left in its default state, watching TV can consume way over 10 Mbps, which results in over 10 GB per day with as much video as we often stream in the evenings. So I used the Pepwave advanced settings to limit bandwidth to the TV to smaller and smaller bandwidths. I had expected that as I dropped below 8 Mbps the picture would noticeably deteriorate, and become unusable below about 5 Mbps.
But what I found was that the picture was still pretty good with the bandwidth limited to 3 Mbps.
Wifi as WAN
The icing on the cake for this device is the ability to connect to a park’s Wifi and use it as an input to the router. The Wifi at each new park we visit can be quickly configured and used instead of cellular if needed.
StarLink
I’m currently signed up to receive StarLink when it becomes available later this year, but I’m thinking I may not need it. Equipment is $499 up front and doesn’t appear RV friendly, monthly fees are $99, the service area is limited to a specific local “cell”.
Maybe in the future they will offer an RV friendly plan, but until then I’ll probably stick with cellular plus park Wifi.
If you’ve been following my home automation activities, then you know that I’ve been fairly invested in using Alexa. Even though I live in an RV which basically has only 3 rooms, I am using 4 (sometimes 5) Echo devices. These provide a very rich voice control experience and I’ve been very happy with them.
A problem with using Alexa, at least from the perspective of one living in an RV, is the requirement of having an internet connection. Without a live internet connection Alexa is dumb as a box of rocks.
However, Alexa doesn’t need a fast connection. So I’ve setup my networking to connect my router to a Verizon Jetpack while I’m on the road. Since I’m a Verizon unlimited customer already, adding a Jetpack only costs about $10/month. It provides 15 gig of high speed bandwidth then throttles down to 600k, which is actually enough for Alexa and for communicating with all my IoT devices. So it continues to work even if I’ve used up the high speed bandwidth.
It’s been a fun year playing with creating home automation software, but totally unproductive. I had decided to write my own Mac Mini, Swift based programming to control all my IoT devices. I did this, and then ran into lots of issues trying to interface with all my IoT devices. To make matters worse, the things I was trying to interface with kept changing (eg. new Samsung Smartthings APIs, programming language, etc). So while I think I came up with a pretty powerful code base for automating my home, I hadn’t actually automated anything in the past year. So I’m going to call that a fun learning experience, but I need to change direction if I actually want to automate my RV home.
Home Assistant v0.91
I experimented with using Home Assistant. For me, it actually made things much more complicated. There are no off-the-shelf solutions for automating the 12v lighting system of an RV. So I have to create my own IoT solutions, and integrating that into another system like Home Assistant just adds another layer of complexity.
Rolling My Own
So having experimented with using Home Assistant, SmartThings, and Homekit, I eventually ended up using the Alexa skills I wrote awhile back, along with Patriot custom Photon coding.
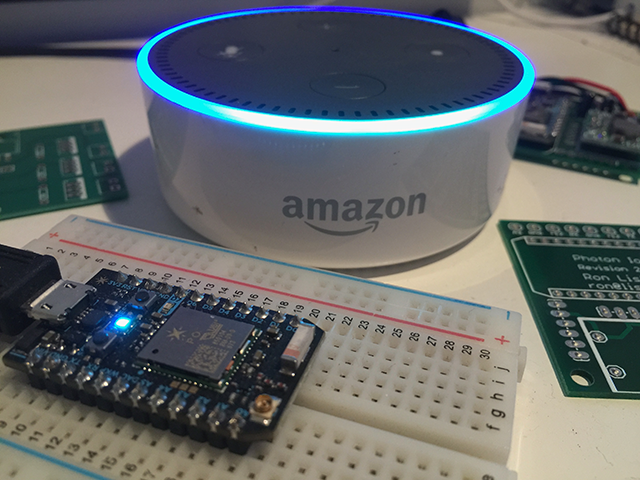
Ok, I feel extremely nerdy. Did you see the episode of The Big Bang where they program an IoT device to turn on a lamp by sending a signal all around the world before it gets back to the lamp to turn it on? Well, I was suddenly struck by the similarity when I got Alexa to turn on the Z-Wave light bulb in my desk lamp last night:
“Alexa, turn on desk lamp”
The voice command is picked up by the Alexa Show device on my desk and sent to Amazon cloud.
Alexa Smart Home converts the audio command to a “turn on desk lamp” intent and routes it to my Alexa Smart Home skill running in an Amazon Lambda in the cloud.
My Smart Home skill converts the intent and forwards a “turn on desk lamp” command to Particle.io.
Particle.io publishes the command to my Photon IoT controllers, one of which is acting as a bridge from particle.io to MQTT.
The Photon bridge reformats the command and publishes it to MQTT.
The MQTT broker is running on a Mac Mini, which then forwards it to all other devices subscribing to MQTT.
One of these MQTT subscribers is the smartthings-mqtt-bridge app running on the Mac Mini. It then receives the MQTT “turn on desk lamp” command, and forwards it to the Smartthings web hook over the internet.
(Should I mention the Wifi to router to … Nah).
The Smartthings server receives the command via web hook, routes it through a Groovy program running in Smartthings, and forwards the command to my Smartthings hub over the internet (and router to wifi, etc).
My Smartthings hub then transmits the “turn on” command over Z-Wave radio to my desk lamp light bulb.
I’ve turned a corner in my thinking about how best to automate my home. For years now I’ve been trying to integrate and generalize all of the various technologies (MQTT, SmartThings, Particle.io, Alexa, iOS, Raspberry Pi, etc) to provide a simplified interface for controlling everything. The tough part is really describing what I want the system to do; how it behaves. Using an any sort of text or table driven, simplified, abstract programming model always comes up short. By this I mean the sort of approach where I am allowed to specify things such as “if device A is on, and the time is after HH:MM PM, then set device B to XX”. This works great for doing fairly simple things, but doesn’t really handle the more complex types of scenarios I always run into, or if it does handle it, it does so in a manner that gets very complicated and unmaintainable very quickly. As a professional programmer, this situation is very familiar, and describes what happens with poorly written code. So I started thinking about how to solve this problem in a way that would be greatly extensible and very maintainable.
And I got to thinking about how Patriot automatically detects new devices. Well, sort of automatic. If I program a Photon to expose a device, and write the Photon code to implement that device, then Alexa can detect it and control it with voice. That’s very cool, but I’m getting tired of having to tell Alexa which lights to turn on and off every morning and night. I want my home automation system to know when to do that based on the plethora of sensors that I’ve installed.
So then the big ah-ha moment for me. Automatically detecting and installing devices doesn’t provide any automation until I write some sort of specific code to control it. This could be generalized code such as IFTTT, or bare bones custom code like Photon C++ or Python code on a Raspberry Pi.
One of the issues that frustrates me is the large number of different programming languages and platforms I’ve had to work with. So recently I decided to replace my Raspberry Pi with a used Mac Mini in order to reduce the number of different programming languages, environments, and platforms I have to remember and work with. The 2010 Mac Mini is quite powerful and flexible, and I found one on craigslist for $150. It’s now my media center as well as my MQTT broker and home automation controller. And I can program it in Swift, which is my daytime job programming language.
So if I have to write code no matter what, why not do it using the best tools, environment, and clean programming practices? To my mind that means Swift programming on the Mac Mini.
So that’s where I’m going with Patriot 4. I’m writing a Mac app in Swift using clean, TDD code. I’ll be sharing the Swift framework that is evolving out of this, but it’s going to require Swift programming skills in order to use it. I’m excited to see just how far this can go.
Over the past few months I’ve done a lot of experimenting with getting various home automation technologies to communicate with each other. For example, setup a Raspberry Pi to bridge between SmartThings and Home Assistant using MQTT. SmartThings in turned connected to my Harmony Hub. Then tied in my Patriot custom electronics devices via MQTT. What I ended up with worked, but seemed overly complex. I don’t even want to try to blog about how to reconstruct such a beast.
So that got me thinking about how to simplify things. I realized that the individual pieces are are fairly simple: SmartThings, Patriot, Harmony. Each of these provides their own Alexa smart home skill, and most of what I want to accomplish can be done entirely by Alexa. So it isn’t really necessary to try to bridge between each of those. Instead, I can let Alexa be the common interface to each of them.
So that’s what I’m trying now. I’ve removed the bridging pieces, and will be using Alexa to control everything. Things certainly are simpler now. I’m hoping that the recently announced support for Echo Buttons indicates a direction for Amazon that will allow other inputs to be used with Alexa. Amazon is holding to their “voice first” mantra, but we’ll see where this goes.
In the meantime, I’m investigating whether I can trigger an Alexa skill lambda handler directly from a Patriot device. I think it may be possible…
As I stated in my last post, trying to understand and control Z-Wave and Zigbee devices sure is confusing.
Having looked at several different controllers and hubs, and used both Zigbee and Z-Wave lights, I’ve come to understand the major differences. But it is indeed confusing.
So here is my simplified, high level understanding and comparison of these two:
Zigbee devices are cheaper than Z-Wave.
For example, the cheapest light bulbs today are about $9 for Zigbee, and $17 for Z-Wave. That’s no big deal if you only need one or two. It is a big deal if you’re replacing a whole house full.
Zigbee is natively supported by the new Echo Plus; no extra hub required.
But if like me you already have Alexa, Dots, and Shows, you’ll still need a hub.
Z-Wave devices are certified.
What this means is that they should inter-operate more reliably, but that is probably why they’re more expensive.
Confusion factors:
Zigbee and Z-Wave are not interchangeable.
You cannot control a Zigbee light with a Z-Wave controller, and vs. a vs.
The SmartThings hub supports both, but Echo Plus supports only Zigbee, etc.
Light bulb advertisements on Amazon don’t always say which one is supported.
I was searching for Z-Wave light bulbs, and kept getting Zigbee bulbs that do not say “Zigbee”. It would be very easy to purchase the wrong type.
How many programmers does it take to control a Z-wave light bulb?
I consider myself fairly technical, but I’ve got to say that trying to understand and control Z-Wave and Zigbee devices sure is confusing. And don’t even get me started with how complicated trying to program them has been. It all began when I decided that I needed to control a regular 120 vac light bulb in a desk lamp on my computer desk. As you can tell from all my earlier posts, I’ve done all my automation so far working with 12v DC, and prefer it that way. So it seemed like just using a Z-wave or Zigbee light bulb would be the easiest approach; no wiring required.
I did some early investigation, and saw that Home Assistant and SmartThings were a couple viable options. So I started putting together a Home Assistant system, while looking at ways for it to control either Zigbee or Z-Wave.
It just so happened that there was a Z-Wave sponsored contest starting, and applicants could receive a free Raspberry Pi + Sigma USB Z-Wave controller + choice of any Z-Wave device. So I applied, was accepted, and chose the Zipato RGBW2 light bulb. Off to a great start!
Home Assistant is an amazing open source project! I like it. I tried using it to control the light bulb via the Sigma controller, but could never quite get it working fully. Oh sure, I could turn the light on or off, but not control the RGB or 2 types of white light. Plus the darn Raspberry Pi 3 kept hanging overnight.
So, in typical programmer fashion, I decided I’d just cut out the middle man and write my own code to control the light bulb. Well, the scarcity of examples and lack of any tutorials made this a very frustrating effort. I never did get the Z-Wave bulb to respond to any of my own code. So when my maximum frustration threshold was exceeded, I decided to punt on writing my own code and give SmartThings a try.
Samsung has put together some pretty extensive, well written developer documentation. So I was initially very optimistic. I ordered a kit that included the hub plus a bunch of sensors, and quickly had the light bulb turning on and off in response to motion and doors opening. However, going from there to integrating with all my other automated lights and Alexa skills was again very challenging. I eventually was able to get everything integrated together by writing a SmartThings Device Handler and Service Manager that could together automatically detect and control my Patriot devices, but then what? In order to automate stuff, I had to write a bunch code, and organizing all this code quickly got out of hand.
In my googling about all this, I came across several posts that shared my experiences; SmartThings can control a lot of stuff, but using it to automate things required writing lots of code. Some of these posts described that Home Assistant was really good at solving that problem. I also read where the Home Assistant guy (folks?) are looking into using machine learning to establish automation rules. That’s the direction I’ve been trying to go. So maybe I’ll throw my hat into that ring.
So I’m back to working with Home Assistant. And I was delighted to find that in the several months since I looked at it before, installing Home Assistant has become simpler and easier.
There are options for connecting SmartThings sensors to Home Assistant using an MQTT broker, and I may take a look at that later. I’ll eventually want to be able to interface with Zigbee devices, and using the SmartThings hub is one option. But we’ll see.
Oh, and the Raspberry Pi hang? I finally figured out that it was caused by leaving an open SSH connection overnight. So now I exit SSH when I’m done using it, and haven’t had any more hangs.
I’m really enjoying using Alexa to control the lights in my home. One down side to this however is the requirement to be connected to the internet. Without an internet connection Alexa becomes a lazy idiot.
Since I live in an RV, I won’t always have a fast internet connection. So what I’ve done to deal with that is to have two separate hot spots, only one of which is ever active at any given time.
When my fast internet (was Roadrunner, will soon be Google fiber) is available and working, it transmits to all my devices.
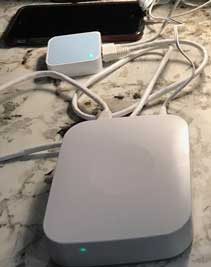
When I’m on the road, or the fast internet breaks (like for the past 5 days!), I plug in a TPLink Nano Wireless N router. This little $35 box is very versatile, and can handle receiving and/or transmitting on Wifi and/or ethernet.
For example, as shown in the image, the SmartThings hub needs an ethernet connection. So the Nano is configured as a “Client”, to receive WiFi from the iPhone and convert it to an Ethernet connection for the hub.
Likewise, with the Nano connected to my normal WiFi router, I can configure the Nano to receive WiFi at whatever RV Park I happen to be staying, and distribute it to all my WiFi and IoT devices without having to reconfigure anything except the Nano.


 Ok, I feel extremely nerdy. Did you see the episode of The Big Bang where they program an IoT device to turn on a lamp by sending a signal all around the world before it gets back to the lamp to turn it on? Well, I was suddenly struck by the similarity when I got Alexa to turn on the Z-Wave light bulb in my desk lamp last night: