Controlling things in my RV with the ControlEverything boards

Boards mounted behind panel

As described in my previous posts, I now have a pair of 8 relay boards from ControlEverything.com controlled by Alexa, an iOS app, and other Patriot devices. So now its time to get to work and actually install the boards and wire them up to the first control panel.


The front control panel in my RV contains the most switches, so I’m going to start there.

The top part contains switches for the vent (open, close, fan) and 5 other lighting switches. So I’m going to need 8 relays.
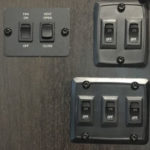
RV control panel top part

  1. Vent fan
  2. Vent Open
  3. Vent close
  4. High counter lights
  5. Low counter lights
  6. Sink handing lamps
  7. Kitchen ceiling lights
  8. Left side trim lights

RV front control panel

The lower section has a bunch of controls and indicators on it, but I’ll only be automating 7 of the switches:

  1. Ceiling lights
  2. Door side outside floods
  3. Opposite door side outside floods
  4. Front porch floods
  5. Front awning LEDs
  6. Front awning extend and retract

So I pulled each panel to see if there is room behind it for the 3″ x 7″ x 1″ boards. Unfortunately there is a water pipe hidden in the midst of all those wires that prevents pushing them back out of the way.

Front panel removedSo my next step was to pull the entire panel as shown. This requires removing 8 screw covers and screws, and then loosing or removing some of the individual control panel screws because they went all the way through to the wood behind the panel.

This is where having a very supportive wife helps, because it looks pretty scary at this point.

Once removed, I could see that there was a ton of room in the bottom section, and sufficient room in the top section. After positioning the boards various ways in those sections, I realized that the bottom section would easily work, but the wire runs would be pretty long. So I considered  using the top section, then realized that the boards would fit at the top of the 2nd section, simplifying routing of the wires.

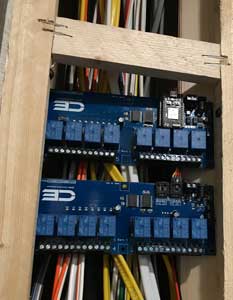
Boards mounted behind panelSo here you can see the boards mounted inside the wall behind the panel. The sides angle inward, so I was able to run a few screws through the holes in the corners of the boards to fasten them. Just by luck, the width of the opening is enough that I can get to the wire screw connectors on the boards.

So once the boards were mounted and 12v power applied, I could test the Alexa interface.

So next I just needed to connect the relays to the 15 switches. The screw terminals are easily accessible, so it’s a matter of just connecting the piggyback terminals and hooking up the 15 wire pairs.
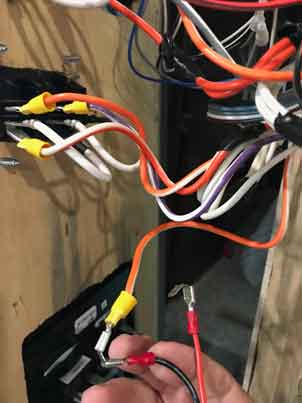
So for each switch:

  1. Attach a pair of wires to the normally open (NO) relay terminals
  2. Attach a piggyback connector to each wire
  3. Remove the connector from the switch
  4. Attach the wire that was going to the switch to the piggyback connector that has the relay’s wire connected to it.
  5. Attach the piggyback connector to the switch.

The result is that the relay is connected in parallel to the light switch, and no wires have been cut.

So after attaching the first relay, I did a quick test with Alexa, and nothing happened. What? I could see the LEDs coming on, I could hear the relay flipping, but the light wasn’t coming on. So after about an hour of measuring the relay terminals, trying other relays, scouring the forums, whining and moping around, I finally figured out that the relays are mislabeled on the Photon 8-Relay board. Relay 1 is actually labeled relay 8. They’re backwards right-to-left instead or left-to-right. So I moved the wires from relay 1 to relay 8, and its working now.

Armed with this new information, I completed hooking up the other 14 relays, and now I can control most of the lights in the main room, the powered vent, about half of the outside lights, and the front awning and its LED strip lights.

Now I’m ready to order a couple more ControlEverything boards so I can tackle the smaller, rear control panel.

RV Lighting Alexa Control

One of the lessons I learned from automating the lighting of my last RV is that I need to have a plan for what to do when it comes time to sell it. I didn’t have a plan, because I thought we were going to live in it until I died. Then it would be someone else’s problem. But now I know that I might have to replace the RV every ten years or so, so I’m going to be a bit smarter about it this time.

For the lighting for this RV, I am going to install my gadgets in a manner that doesn’t interfere with the operation of the existing switches. That way I can choose to simply disable the IoT automation, and everything will continue to work as it did the day I bought the RV. Also, I want to make it easy to remove the automation controllers without having the splice or repair any wiring going to the switches or lights.

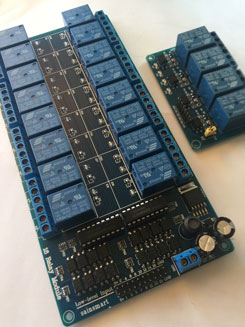
Sainsmart Relay boards

To allow the switches to continue to work without automation, I’m going use relays connected in parallel with the switches. When using automation, the switches will be left off and the automated relays will open and close the circuit. When the relays are off or have been removed, the switches will continue to work as before. Since most of the lights are located in one of two control panels, that means I can probably handle most the lights with a pair of Photon controllers, each with a Sainsmart 16 relay board.

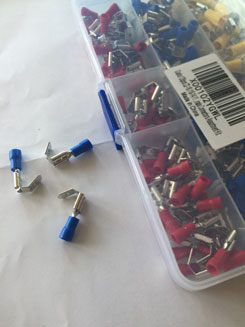
Piggyback Terminals
Piggyback Blade Terminals

To allow connection without modifying the wiring, I’m going to use piggyback blade connectors.

And of course, the Photon will be running the Patriot library to allow both iOS and Alexa voice control. Time to warm up the soldering iron.

Author update:

Upon connecting the Sainsmart 16-relay board to the Photon output pins (5v tolerant) I discovered that the relays are always energized. The 3.3v HIGH signal is  insufficient to turn off the relay. I could add level converters, MOSFETs, etc. to get this to work, but I don’t want all that extra circuitry flopping around when the RV is bouncing down the road. So I’m going to take a different tack.

Control Everything

In looking for Photon (3.3v) compatible relay boards, I came across some relay boards made by  ControlEverything.com. These contain various numbers of mechanical or solid state relays. They have a built-in regulator to allow 12v input to the board. And best of all the the Photon plugs directly onto the board. This will eliminate a bunch of wiring.

Even better, multiple boards can be daisy chained via I2C. So for example, I can start with an 8 relay board, then add an additional 8 relay I2C board without the need for another Photon. Surprisingly, the two 8 relay boards (with and without Photon) are a bit cheaper than a 16 relay board.

I’ve received the boards, and am starting to experiment with them. Things look very good so far, but I’ll need to modify the Patriot plugins to handle talking with the relays via I2C instead of direct pin mappings. I’ll be blogging about that in the next post.

P.S. Sainsmart has be great to work with, and I would definitely work with them in the future. This combination of parts just didn’t work out for this project. And no, they didn’t pay me to say that 🙂

Patriot Plugin Architecture

Having released Patriot iOS and Alexa Smart Home skills, it’s time to get back to improving and extending the Particle.io Photon code. One of the obvious deficiencies with the existing code is that it requires that device support be built into the library. This is fast and really convenient if you just happen to want to use the included devices, but sucks if you have other devices you want to use. It’s all open sourced, so anyone can modify it however they’d like, but that sort of misses the whole point of Patriot: to allow hobbyists to focus on solving problems and not on how to build all the components. And the code is getting fairly complex, so it’s not a trivial task.

I’ve been thinking for awhile now that I’d need to add some sort of plug-in capability to greatly simplify adding support for new devices. This would also have the benefit of only including the code that’s needed by each particular sketch. Recently, there have been a few folks having trouble compiling the 3rd party DHT module. It seems that there are some differences between compiling natively and compiling in the Particle.io web IDE. An the irony is that DHT support might not even be needed for the folks having these problems. So my lazy solution is remove the DHT code and put it into a plugin.

So that’s what I’ll be working on for the next couple weeks. I’ll update this post with details as I work them out.

Patriot iOS App

Patriot iOS appThis weekend I posted to GitHub the source code for a Patriot iOS app. This is a cleaned-up version of an app that I wrote awhile back to control Photon devices in my RV. The intent is to allow mounting old iPhone devices to the wall to use as control panels for my Photon controllers. Refer to my previous article about Patriot for information about the Particle.io code and Alexa skill.

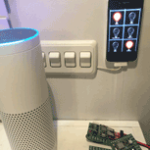
In the image here you can see 3 different ways of controlling a Photon controller. There is an Alexa sitting next to an iPhone 4s mounted to the wall next to several wall switches.

The Problem with Switches

The switches are connected to a Photon mounted in the wall behind them and actually broadcast particle.io events instead of directly controlling power to lights. They can control multiple lights, or even things that aren’t lights. I had intended to put a bunch of switches like these around my home, but there’s a problem with mechanical switches like these. They suggest a ‘state’ of on or off. So for example, typically a switch would be “on” if one way, and “off” if the other. However, if I turn a a light on by flipping a switch up, then I turn the light off by telling Alexa to turn it off, then the switch continues to indicate “on” but the light is actually off.

Alexa Smart Home Skill

The Alexa is running the Patriot Alexa smart home skill to dynamically determine the events that my IoT Photons are listening for, so I can tell Alexa to turn activities on or off. But as described above, this leaves normal switches indicating the wrong state. So I decided that I need some sort of switch that can change to reflect the state even when changed by other devices or switches.

Old iPhone Devices to the Rescue

So an obvious choice is to use motorized switches. Unfortunately I couldn’t find any in my parts locker. But I did come across several old iPhones and began to think about how extremely powerful these could be to control my IoT devices. So I wrote a simple control panel app that displays the state of a list of hard coded activities, and allows tapping on them to toggle their on/off state. I then purchased some cheap plastic iPhone covers for them that I mounted to the walls, and can just snap the iPhones into place to hold them on the wall. I ran a power wire over, and voila!

Nice, works ok, but my head nearly exploded when I started thinking about  all the ways these could be extended. Before I start going on about possible future enhancements, let me announce that I have cleaned this original code up, extended it to use the latest Patriot dynamic device discovery, and posted the Swift source to Github.


The Possibilities of Patriot iOS Control Panels

So now that we have a system that allows old iPhones to communicate with our IoT system, what are some of the things that we can do to leverage the incredible power of these cheap devices? Here’s just a short list of some things that I’ve come up with so far:

  • Utilize BLE to detect the presence of certain other iPhones to monitor my comings and goings. Turn on lights when I get home after dark, etc.
  • Put a BLE tag on my car and motorcycle to track when they are at home or away or being stolen. Combined with the above…
  • Coordinate with Alexa commands to dim or display the panels.
  • Provide other views such as video chat, monitoring outside, etc.
  • Mount one of these outside to use as a doorbell with camera and audio intercom.
  • Use the back facing camera to perform motion detection, face recognition, etc. This one really has my head spinning. I intend to start looking into OpenCV to see about replacing simple motion and proximity detectors with just the camera mounted on the iPhones.
  • Motion detection and GPS: since my home is an RV, these may prove handy for a lot of things.

And the list just goes on and on. So this iOS code is intended as just a starting point. I hope others will get involved and contribute also.

Alexa Smart Home Skill

I’ve now replaced my previously created Alexa Custom Skill with an Alexa Smart Home Skill. I’ve been holding off doing this because of the difficulty of setting up an OAuth2 server. Recently I came across an article describing how to use Login With Amazon to do this though, and I have gotten that working now.

So now I don’t have to say the name of the custom skill when invoking Alexa. Using the custom skill, I would have to say something like “Alexa, tell My RV to turn on the computer”. Sheesh. Quite a mouthful. And easy to get wrong. But using an Alexa Smart Home skill, I now only need to say something like “Alexa, computer on”. This seems like a small change, but it has made a big difference.

I’m working on providing some instructions, and then I’ll post all this code to Github.

Update: I’ve now converted the skill from using the Login with Amazon to using the particle.io oauth directly, and I’ve published the skill. What this means is that it can now be used by anyone, and it will prompt you during installation of the skill to provide your Particle.io login to access your devices. Refer to my other posts and Hackster.io project for more details. I had initially call this ParticleIoT, but that was hard to say and spell so I renamed it Patriot which uses many of the same letters.