How to connect Echo’s Alexa to an Arduino

Introduction

As mentioned in my last post, I have connected my Echo to interface with my Arduino controlled RV lights. And thanks to the Particle.io Photon, this was quite easy. Perhaps the toughest part about this process has been getting past all the unfamiliar language used by Amazon, such as “Lambda functions”, “Skills”, and so forth. The actual implementation was fairly quick and easy, as I’ll explain in this post and the accompanying GitHub project.

Who is Alexa, and what is an Echo?

In a nutshell, the Amazon Echo is a small electronic device that you can interact with using spoken natural language. It has directional listening capability that allows it to hear you talk even in a noisy environment; for example when you’re playing the TV or stereo. It responds to you after you speak the work “Alexa”.

Requirements for connecting Alexa to your Arduino

You don’t have to own an Amazon Echo to get started. You can design and build a voice controlled interface, and test it using the Alexa Skills Kit (ASK) Service Simulator. The simulator allows you to type in what you would speak, and responds exactly as the Echo device would.

You’ll need to join the Amazon developer program, and setup an Amazon account to handle the backend. Both of these things can be done for free.

I’ve posted all the details on Github. I’ll warn you though; the instructions appear quite long. But don’t be deterred. None of the steps are particularly difficult, and the results are amazing!

I’ve been sharing tips and ideas with my buddy Don. He’s setup his Echo to control his pipe organ clocks. You can check out his work on facebook or at donholmberg.com. There’s also a blog article on Mutual Mobile’s website talking about some of our Arduino projects before connecting them to the Amazon Echo.

I’m having a blast working with all this new technology, and its fun to be able to use it to enhance my RV lifestyle!

Lavaca and Bower and Grunt, oh my!

I had a couple weeks off over the holidays. Since we didn’t have any big plans, I wanted to take the opportunity to learn something different. So I chose to dive into learning Lavaca.

Lavaca is a “curated collection of tools” that provides a “web application framework designed to jumpstart development of hybrid and single page applications”. It is available free from Github.

I had really thought that this would be a fairly quick exercise. I’m already familiar with HTML, CSS, JavaScript, jQuery, PHP, and so forth. But I was in for a bit of a surprise. I guess in the past few years that I’ve been focused on learning iOS and native mobile technologies, the face of web development has changed. And it’s changed a lot.

I’m glad to say that the days of throwing together some HTML, CSS, and JavaScript files to create a static website are gone. Websites are now created using real software engineering practices such as build systems, automated testing, dependency management, and formal deployment mechanisms. Sure, one can still throw together some files and upload them using FTP, but why would one want to do so? The good news is that there are powerful, open source tools available to automate and manage the whole process. The bad news (for me) was that there are a bunch of powerful, open source tools that I needed to learn to use. But that’s not really bad news, is it?

I realized that I needed a project to work on. I’ve never been able to learn new things very well unless I could find some way to apply it. So I reached back into my past projects, did some looking around, and found that the Celestino Couture website that I converted to WordPress several years ago hadn’t been updated in about that long. So I contacted Rusty and Sergio and asked if I could use their website as an exercise in learning Lavaca, and with their ok, off I went.

My goal in this exercise is to create a responsive web design that will be easy to maintain and extend over time, and can be deployed natively to Android and iOS devices, as well as the web and other mobile devices.

So I created a test site, and started through the Lavaca Guide, taking side trips to go learn Bower, RequireJS, Node, Grunt, YUIDoc, Dust, LESS, and Jasmine. It’s been fun, and I still have a lot to learn and a lot to do to finish up the new website, but it’s been a great experience. I’m really delighted with what our web team has been doing with Lavaca, and glad to get a better handle on the capabilities of responsive web versus native apps.

So that’s what I did over the holidays. I’ve got to say that it has been a blast! I still have a lot of learning to do, but I’m really enjoying it.

Android Development

As part of my work at FanTrail, I am responsible for testing and creating the test automation for web services, iPhone applications, and soon Android applications.

So to prepare for Android testing, I’ve downloaded and begun playing with the Android SDK. Wow, guess what? It is also Eclipse based. So I simply added the Android Eclipse plug-in to my existing Zend Studio/Eclipse installation, and I was up and building test code in almost no time (Well, actually the download itself took the most time).

Now I’m having to brush off my Java skills, and I’m ready to dive in. I had initially resisted getting involved with Android for fear that it would interfere with my iPhone skills, but I’m rethinking that now. So maybe there are Celestino and/or Leander KOA Android apps in my future…

FLEXing my muscles

I’ve finished revamping the Celestino Couture website. This will be the second revision. I had originally redone their website using Flash Pro. This was a great learning exercise, but I wanted something that fit my programmer experience better.

So when Rusty contacted me about updating the website with their new press articles and collection, I decided to take things to the next level and convert the Flash site to Flex.

This turned out to be much easier than I thought. Adobe’s Flex Builder is built on top of Eclipse. I’m a long time Eclipse user, and use Zend Studio (also built on top of Eclipse) for most of my web development. Since I am already familiar with both ActionScript and Eclipse, it was just a matter of learning Flex and MXML.

I’m really delighted with the results. Appearance-wise not much has changed, but under the covers this is a very maintainable website. All code has been tracked from the beginning with Subversion, and the code is easily organized into components.

Now I’m integrating FlexMonkey testing which will bring this website up to my normal, professional standards.

Rusty has been very patient with me in doing all of this, but I expect that the next updates will happen in the order of hours instead of weeks.

The site should be online this week, after I get the go-ahead from Rusty and Sergio. Until then the release candidate website can be viewed on my test site. Once it is online at the official Celestino website I will remove it from the test site.

Using JavascriptMVC in WordPress

I’m working on a project which is going to involve some pretty extensive JavaScript coding. From experience, I know that any moderately sized or larger coding project needs to be well planned out and organized. But JavaScript typically isn’t.

So I did a lot of researching, and I’ve found a framework that appears to be fairly industrial strength. By this I mean that it is fairly well documented, provides examples, and has internal support for testing and automatic documentation generation.

I’m talking about JavascriptMVC. It is a little intimidating at first, mainly because it does provide all the things listed above. But having done some quick prototyping in my environment (PHP, Zend, WordPress), it appears to fit nicely and provide just the MVC+Test+Doc environment that I need.

I’m going to be merging JMVC into my existing WordPress installation. It appears that I’ll need to deal with the jQuery.noconflict issue which I plan on doing by redefining “var $ = jQuery;”. I’ll then be embedding the JMVC steal.js code using my custom child template (in functions.php).

This is really exciting. I’ll post more as I go. If anyone else has tried this before, please leave me a comment.

KOA iPhone App is finished

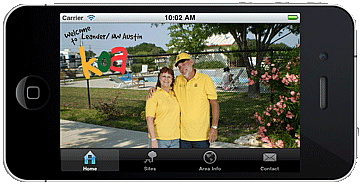
I’ve completed the KOA iPhone app. I will be finishing testing and submit to the App Store by the end of the week.

Leander KOA iPhone App

Now I am going to create a matching website that will provide the same functionality for those poor souls that do not own an iPhone. From my experience, about 90% of all KOA campers have computers. We currently hand out a local attraction pamphlet which lists local restaurants, stores, and services. But the space on the pamphlet is limited. Providing a website/iPhone app allows providing dynamic searching and sorting, allowing a larger list to be provided.

One really cool thing about the iPhone for this sort of application is the built-in location services (GPS). Not only can I provide a list of items sorted alphabetically or by location, but I can sort the list dynamically based on the users current location, not just the distance from the KOA.

Celestino iPhone Application

Celestino Couture iPhone Application

I’ve just completed porting the Celestino website to an iPhone application.

I had been looking for an idea for an application to refresh my iPhone skills, and this fit the bill nicely.

This application is essentially the Celestino website deployed as an actual iPhone application. It is not just a web viewer or shortcut to the site.

It is available on the Apple iTunes App Store.

Going Mobile

God is taking us yet another direction. We are in the process of selling our home and becoming full-time RVers. Alas, this means that we will be unable to conduct our workshops from our home anymore.

I am going to continue website coaching and smaller design projects. I’ll just be doing it from wherever I happen to be. We’ll also be rebranding from our current Website Workshops to the more appropriate Nomad Websites name.

I apologize to those of you that wanted to attend one of our future workshops. I will continue to be available for 1-on-1 training while I am in the area.

Feeding your Facebook to Twitter

Facebook provides a simple way to connect to Twitter. To enable your Facebook content to your Twitter account, login into Facebook and then navigate to http://www.facebook.com/twitter. From there add your Twitter account information to link to it.

Feeding your WordPress posts to Facebook

The RSS supported built into WordPress makes it easy to write a post in one place and have it appear in other places like FaceBook and Twitter. FaceBook automatically generates multiple RSS feeds based on categories and/or tags, so you can get as fancy with this as you want. For example, you can create a tag “FaceBook” and then have only those posts tagged “FaceBook” appear on your FaceBook.

To enable your WordPress posts to appear in you FaceBook stream, simply configure Account -> Application Settings -> Notes and select “Import my blog” on facebook and point it to your WordPress blog URL. If you just list the blog URL you will get all posts. Alternatively you can use the URL to a specific category or tag.

To keep the size of the post fed to FaceBook reasonable, set your WordPress reading settings “For each article in a feed, show:” to “Summary”.