Living the Dream of Living On The Road

For over ten years now, it has been a dream of ours to be able to live and work in our RV from all over America. I’m delighted to say that the dream has finally become a reality.

Shelley and I have been living in an RV for about 12 years now, but the combination of finances, technology, and family responsibilities have limited our ability to be away from the Austin area. As a programmer, I can basically do my job anywhere as long as I have a good internet connection. But many RV parks have terrible Wifi, even if they advertise that they have it. And cellular plans with broad coverage and high data limits have been pretty expensive. But the cost of cellular plans continue to drop, and coverage areas are continuing to expand. So this past year I think things finally reached a point where we can afford to get good coverage just about anywhere in the US.

Our plan is to travel on weekends, then work Monday through Friday wherever we happen to be. Also, since this is going to be an ongoing thing, we’re not going to be driving long days when we travel. It’s one thing to put in a long driving day for an annual vacation or such, but totally different when we’re doing it every weekend. Driving and seeing new places is a lot of fun when it’s only a few hours a day. It stops being fun when those drives are over about 4 hours or so. So we’re trying to limit our driving to about 4 hours per day.

We started gradually, testing out the idea of working using just cellular connections by making short trips to nearby state parks without Wifi: McKinney Falls, about 30 minutes away, and then Inks Lake, less than an hour away. These worked out just great.
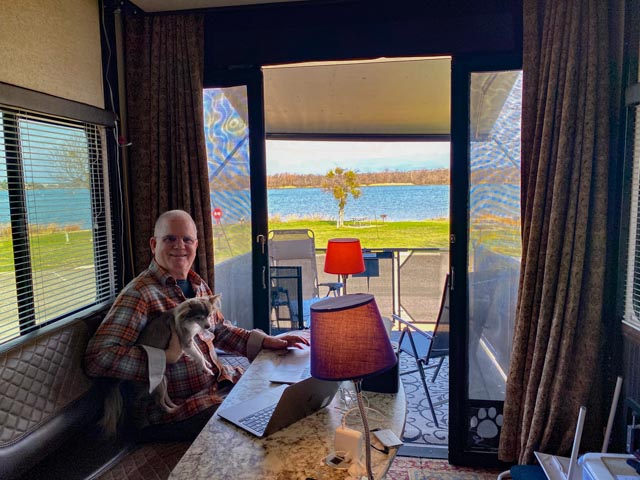
Office on Inks Lake
My Office (and assistant) on Inks Lake

So now we’re in the process of testing being away for a whole month. We’re traveling to Tampa, FL to spend a couple weeks visiting with our daughter Jackie. Sticking with our “4 hours per day” plan, we’re planning on driving from Austin to Meaher State Park in Alabama over the weekend of April 23-25, then staying and working from there for a week. Then we’ll drive from there to Tampa FL over the weekend arriving on May 2nd. We’ll stay and work there for 2 weeks. And we’ll see how it goes, and learn and make adjustments as we go.

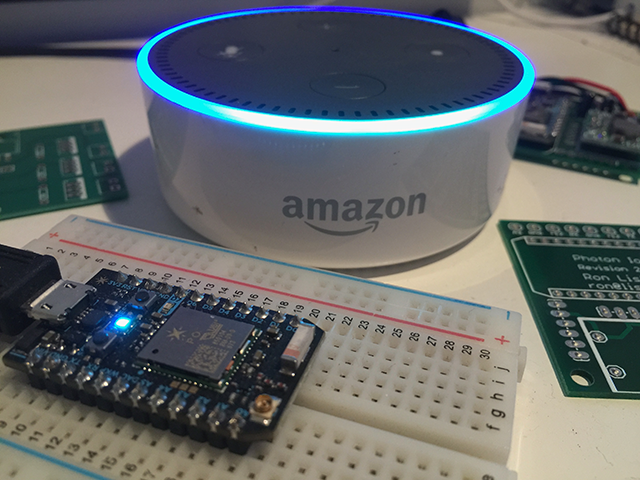
Home Automation with Alexa Needs Internet

If you’ve been following my home automation activities, then you know that I’ve been fairly invested in using Alexa. Even though I live in an RV which basically has only 3 rooms, I am using 4 (sometimes 5) Echo devices. These provide a very rich voice control experience and I’ve been very happy with them.

A problem with using Alexa, at least from the perspective of one living in an RV, is the requirement of having an internet connection. Without a live internet connection Alexa is dumb as a box of rocks.

However, Alexa doesn’t need a fast connection. So I’ve setup my networking to connect my router to a Verizon Jetpack while I’m on the road. Since I’m a Verizon unlimited customer already, adding a Jetpack only costs about $10/month. It provides 15 gig of high speed bandwidth then throttles down to 600k, which is actually enough for Alexa and for communicating with all my IoT devices. So it continues to work even if I’ve used up the high speed bandwidth.

Home Automation Fun

It’s been a fun year playing with creating home automation software, but totally unproductive. I had decided to write my own Mac Mini, Swift based programming to control all my IoT devices. I did this, and then ran into lots of issues trying to interface with all my IoT devices. To make matters worse, the things I was trying to interface with kept changing (eg. new Samsung Smartthings APIs, programming language, etc). So while I think I came up with a pretty powerful code base for automating my home, I hadn’t actually automated anything in the past year. So I’m going to call that a fun learning experience, but I need to change direction if I actually want to automate my RV home.

Home Assistant v0.91

I experimented with using Home Assistant. For me, it actually made things much more complicated. There are no off-the-shelf solutions for automating the 12v lighting system of an RV. So I have to create my own IoT solutions, and integrating that into another system like Home Assistant just adds another layer of complexity.

Rolling My Own

So having experimented with using Home Assistant, SmartThings, and Homekit, I eventually ended up using the Alexa skills I wrote awhile back, along with Patriot custom Photon coding.

Backup Internet for my Alexa and Particle.io Devices

I’m really enjoying using Alexa to control the lights in my home. One down side to this however is the requirement to be connected to the internet. Without an internet connection Alexa becomes a lazy idiot.

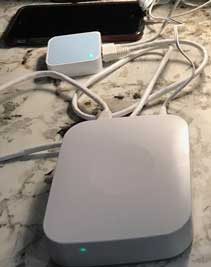
SmartThings, TPLink Nano, and iPhone

Since I live in an RV, I won’t always have a fast internet connection. So what I’ve done to deal with that is to have two separate hot spots, only one of which is ever active at any given time.

When my fast internet (was Roadrunner, will soon be Google fiber) is available and working, it transmits to all my devices.

When I’m on the road, or the fast internet breaks (like for the past 5 days!), I plug in a TPLink Nano Wireless N router. This little $35 box is very versatile, and can handle receiving and/or transmitting on Wifi and/or ethernet.

For example, as shown in the image, the SmartThings hub needs an ethernet connection. So the Nano is configured as a “Client”, to receive WiFi from the iPhone and convert it to an Ethernet connection for the hub.

Likewise, with the Nano connected to my normal WiFi router, I can configure the Nano to receive WiFi at whatever RV Park I happen to be staying, and distribute it to all my WiFi and IoT devices without having to reconfigure anything except the Nano.

Teaching Alexa What To Do

In the last post I described combining an Alexa custom skill with an Alexa smart home skill. Well, I got that working this past week and it works great. The combination really has some interesting potential.

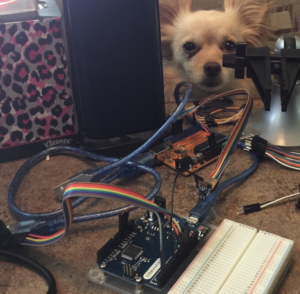
Chihuahua and electronics
Just a cute little doggie watching me wire stuff together.

Smart home skills are great because they’re short and simple, and the supported device names can be extended dynamically through the “discovery” process.

Custom skills are great because they’re very flexible, and allow interactive dialog, unless something fits into a lot, isn’t extensible.

Putting the two together can provide the best of both. Here’s what a dialog with Alexa sounds like using both the Patriot smart home skill and the new Patriot custom skill.

Initially the skills don’t know about any activity called “computing”. So when I say:

“Alexa, turn on playing piano”, it responds with “Sorry, I didn’t find playing piano”.

That’s as expected. So let’s teach Alexa what we want it to do when we say “playing piano”. Note that I’ve made the invocation words “my lights”.

“Alexa, tell ‘my lights’ to turn on office when I say playing piano”

Then Alexa responds with:

“Ok, from now on when you say ‘playing piano’ I will set ‘office’ to 100 percent. This is a new activity, so you’ll need to tell me to ‘discover devices’ if you want to use the smart home command ‘start playing piano’.”

How cool is that?

So then saying “Alexa, discover devices” results in “Ok, found one new device ‘playing piano'”.

And then I can say “Alexa, start playing piano” and the office light comes on.

Controlling things in my RV with the ControlEverything boards

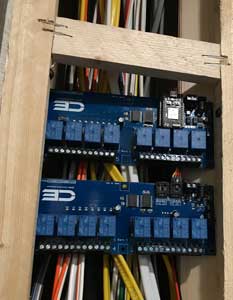
Boards mounted behind panel

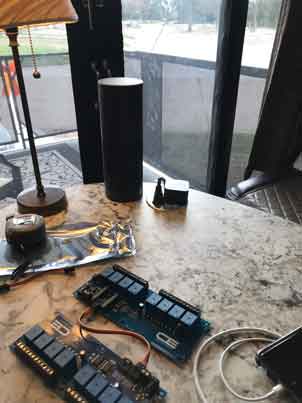
As described in my previous posts, I now have a pair of 8 relay boards from ControlEverything.com controlled by Alexa, an iOS app, and other Patriot devices. So now its time to get to work and actually install the boards and wire them up to the first control panel.


The front control panel in my RV contains the most switches, so I’m going to start there.

The top part contains switches for the vent (open, close, fan) and 5 other lighting switches. So I’m going to need 8 relays.

RV control panel top part

  1. Vent fan
  2. Vent Open
  3. Vent close
  4. High counter lights
  5. Low counter lights
  6. Sink handing lamps
  7. Kitchen ceiling lights
  8. Left side trim lights

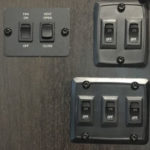
RV front control panel

The lower section has a bunch of controls and indicators on it, but I’ll only be automating 7 of the switches:

  1. Ceiling lights
  2. Door side outside floods
  3. Opposite door side outside floods
  4. Front porch floods
  5. Front awning LEDs
  6. Front awning extend and retract

So I pulled each panel to see if there is room behind it for the 3″ x 7″ x 1″ boards. Unfortunately there is a water pipe hidden in the midst of all those wires that prevents pushing them back out of the way.

Front panel removedSo my next step was to pull the entire panel as shown. This requires removing 8 screw covers and screws, and then loosing or removing some of the individual control panel screws because they went all the way through to the wood behind the panel.
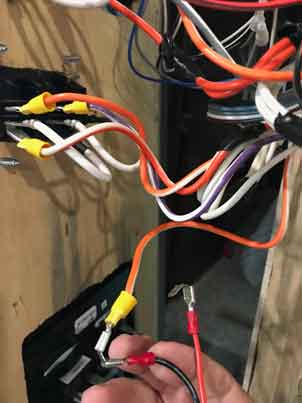
This is where having a very supportive wife helps, because it looks pretty scary at this point.

Once removed, I could see that there was a ton of room in the bottom section, and sufficient room in the top section. After positioning the boards various ways in those sections, I realized that the bottom section would easily work, but the wire runs would be pretty long. So I considered  using the top section, then realized that the boards would fit at the top of the 2nd section, simplifying routing of the wires.

Boards mounted behind panelSo here you can see the boards mounted inside the wall behind the panel. The sides angle inward, so I was able to run a few screws through the holes in the corners of the boards to fasten them. Just by luck, the width of the opening is enough that I can get to the wire screw connectors on the boards.

So once the boards were mounted and 12v power applied, I could test the Alexa interface.

So next I just needed to connect the relays to the 15 switches. The screw terminals are easily accessible, so it’s a matter of just connecting the piggyback terminals and hooking up the 15 wire pairs.

So for each switch:

  1. Attach a pair of wires to the normally open (NO) relay terminals
  2. Attach a piggyback connector to each wire
  3. Remove the connector from the switch
  4. Attach the wire that was going to the switch to the piggyback connector that has the relay’s wire connected to it.
  5. Attach the piggyback connector to the switch.

The result is that the relay is connected in parallel to the light switch, and no wires have been cut.

So after attaching the first relay, I did a quick test with Alexa, and nothing happened. What? I could see the LEDs coming on, I could hear the relay flipping, but the light wasn’t coming on. So after about an hour of measuring the relay terminals, trying other relays, scouring the forums, whining and moping around, I finally figured out that the relays are mislabeled on the Photon 8-Relay board. Relay 1 is actually labeled relay 8. They’re backwards right-to-left instead or left-to-right. So I moved the wires from relay 1 to relay 8, and its working now.

Armed with this new information, I completed hooking up the other 14 relays, and now I can control most of the lights in the main room, the powered vent, about half of the outside lights, and the front awning and its LED strip lights.

Now I’m ready to order a couple more ControlEverything boards so I can tackle the smaller, rear control panel.

Automation Using the Control Everything Relay Board

ControlEverything.com boards

As I mentioned in the previous post, I’m going to give the ControlEverything.com boards a try. I’ve received the 8 relay Photon board, an 8 relay I2C expansion board, and the cable to interconnect them.

So to start off, I plugged a Photon into the 8 Relay Photon board, connected 12v to the board, and worked through their getting started tutorial.

I flashed the Photon with the example I2C scan code, and it immediately detected the I2C port at address 32.

Next I tried out the example from their NCD8Relay library on GitHub. This worked great. It toggles the relays in various ways. You can hear the relays toggling, in addition to seeing the status LED of each turn on and off.

So next I needed to figure out how to integrate this board with Patriot. Currently Patriot assumes a dedicated pin to control each device. Since the ControlEverything.com boards use I2C, I’d need to make some changes.

So next I created a new Patriot plugin library named NCD8Relay. This plugin should work with any of the NCD relay boards. There are two different I2C chips used on the boards, so addressing needs to take that into account. Since I don’t have any of the other sized relay boards, only the 8 relay photon and I2C expansion boards are tested at this point.

So having extended Patriot with the NCD8Relay plugin, I verified operation of the boards using both the iOS app and Alexa smart home skill. This all looks pretty good, so the next step will be to mount the boards behind the lighting control panel and wiring them up. That’s coming up in the next post.

RV Lighting Alexa Control

One of the lessons I learned from automating the lighting of my last RV is that I need to have a plan for what to do when it comes time to sell it. I didn’t have a plan, because I thought we were going to live in it until I died. Then it would be someone else’s problem. But now I know that I might have to replace the RV every ten years or so, so I’m going to be a bit smarter about it this time.

For the lighting for this RV, I am going to install my gadgets in a manner that doesn’t interfere with the operation of the existing switches. That way I can choose to simply disable the IoT automation, and everything will continue to work as it did the day I bought the RV. Also, I want to make it easy to remove the automation controllers without having the splice or repair any wiring going to the switches or lights.

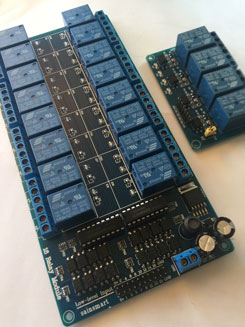
Sainsmart Relay boards

To allow the switches to continue to work without automation, I’m going use relays connected in parallel with the switches. When using automation, the switches will be left off and the automated relays will open and close the circuit. When the relays are off or have been removed, the switches will continue to work as before. Since most of the lights are located in one of two control panels, that means I can probably handle most the lights with a pair of Photon controllers, each with a Sainsmart 16 relay board.

Piggyback Terminals
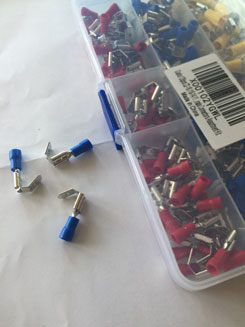
Piggyback Blade Terminals

To allow connection without modifying the wiring, I’m going to use piggyback blade connectors.

And of course, the Photon will be running the Patriot library to allow both iOS and Alexa voice control. Time to warm up the soldering iron.

Author update:

Upon connecting the Sainsmart 16-relay board to the Photon output pins (5v tolerant) I discovered that the relays are always energized. The 3.3v HIGH signal is  insufficient to turn off the relay. I could add level converters, MOSFETs, etc. to get this to work, but I don’t want all that extra circuitry flopping around when the RV is bouncing down the road. So I’m going to take a different tack.

Control Everything

In looking for Photon (3.3v) compatible relay boards, I came across some relay boards made by  ControlEverything.com. These contain various numbers of mechanical or solid state relays. They have a built-in regulator to allow 12v input to the board. And best of all the the Photon plugs directly onto the board. This will eliminate a bunch of wiring.

Even better, multiple boards can be daisy chained via I2C. So for example, I can start with an 8 relay board, then add an additional 8 relay I2C board without the need for another Photon. Surprisingly, the two 8 relay boards (with and without Photon) are a bit cheaper than a 16 relay board.

I’ve received the boards, and am starting to experiment with them. Things look very good so far, but I’ll need to modify the Patriot plugins to handle talking with the relays via I2C instead of direct pin mappings. I’ll be blogging about that in the next post.

P.S. Sainsmart has be great to work with, and I would definitely work with them in the future. This combination of parts just didn’t work out for this project. And no, they didn’t pay me to say that 🙂

Converting the RV Garage to an Office

One of the reasons why we chose a toy hauler for our new RV is the “garage” provides an additional room that can be fixed up to serve as a home office. We did that with our previous RV, and it worked out quite nicely. I think we’re going to be even more pleased with the one in our new RV.

Installing carpet
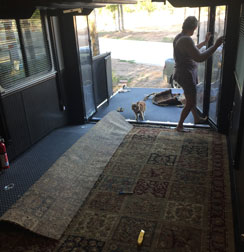
Carpeting the garage

So the first thing we needed to do to make the garage more livable was to install carpet. My wife Shelley had found a good deal on a used rug that was 9′ x 14′, so we trimmed it back to custom fit the 8′ x 13′ garage floor.

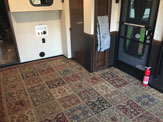
Carpeted Garage
Finished garage carpet

We had additional trimming to do around the corner bathroom and side door, but it worked out great!The 13′ garage is a bit larger on the 10′ garage on the last RV, and there is a small bathroom. So in addition to allowing us haul our motorcycle along with us, in can double as both an office and a guest bedroom.

It sports motorized queen size bunk beds that can be raised entirely up to the ceiling to make room for hauling multiple motorcycles, or lowered individually or together for sleeping. The bottom bed folds back to form a pair of benches, with a removable table between.

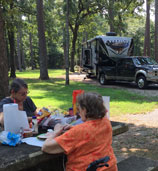
Picnic with Mom

On our last trip we took my mother-in-law with us up to Kansas for my son’s wedding. We made half the lower bunk into a bed for her, and left the other bench setup to use with the table for eating lunch, etc.

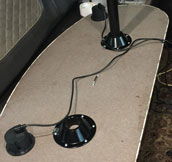
Another change that was needed was to provide power to the table that I’m using as a desk.


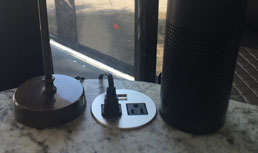
With an iMac, charging cords, and Amazon Echo, at at times a soldering station, I need several power outlets. I initially just ran extension cords, but quickly got tangled up in them. So I searched around and found some circular outlet boxes that provide both 120 vac outlets and USB ports. These mount through a hole I drilled into the table surface, and mount fairly flush.

Outlet in table

This allows using the table to eat, play games, etc. when not using the table as a computer desk. And of course the office balcone is awesome, especially when I can hang it over the edge of a lake.

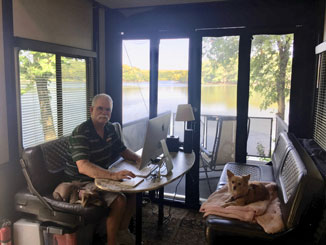
Ron sitting in office by a lake
My office by the lake

A New RV Means New IoT Opportunities

The RV park where we stay most of the time will be enforcing a 10-year policy. This means that in order to stay here, my RV has to be 10 years old or newer. Unfortunately, the RV that I’ve been automating for the past few years is 10 years old. So the options are move, or replace it. Since we really like staying at this park, we’re choosing to upgrade the RV.

We looked at replacing it with another used RV. When I did the math though, it actually came out reasonable to purchase a new one that we can keep for 10 years as opposed to buying a used 5-year old unit then replacing it again in 5 year.

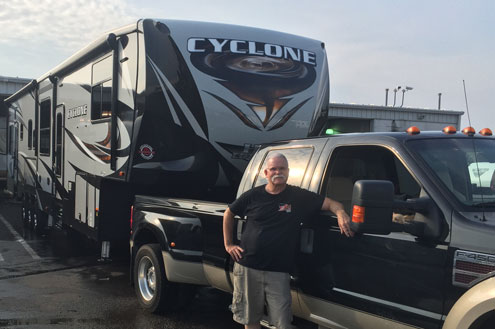
So after much shopping, searching, praying, and looking, we finally decided on a new Heartland Cyclone 4005. This is a huge 45′ toy hauler with most of the amenities included. Shopping around locally, it was a bit out of our budget. But searching nationwide for it, I found that it could be had for about $15,000 less if I drive north a couple states to pick it up.

Ron with new RV
Picking up the RV in Troy, Ohio.

So we ended up working with the Dave Arbogast RV dealership in Troy, Ohio to purchase it. Their price was as low as we could find, and the folks we easy to work with. We could have had the RV delivered to Texas for about $2,500, but we opted to drive up there and pick it up ourselves.

En route to picking it up, we swung a little bit out of the way to go by the Heartland factory in Elkhart, Indiana to take the tour of their toy hauler plant.

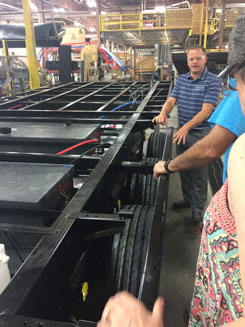
RV tour
Dustin giving us the tour of the Heartland Cyclone plant.

Serendipitously, the models being built were the exact same Cyclone 4005 model that we had purchased. Some were a different color with different options selected, but it was like watching our unit being built in various stages of completion. They must have about 12 units in the assembly line at one time working their way toward completion. This was a terrific tour and we enjoyed it very much. Dustin is the manager that gave us the tour, and he was great about explaining how and why they build them the way that they do. For not being a marketing guy, he sure made us feel very good about having chosen a Heartland RV, and the unit that we had picked. I took of course a thousand pictures, so I now have a pretty good idea of what’s behind the various walls, floor, and ceiling for when I go to customize or repair it in the future.

Since the Cyclone 4005 is a high end toy hauler, there really weren’t many options to choose from. The options that we got to choose were:

  • Upholstery color: we chose the dark brown over the medium brown color.
  • Optional ramp patio package and 3-season wall for the rear ramp. This allows the ramp to be folded down to become an outside deck. Since I’ll convert the garage into my office when not hauling a motorcycle, I think of this as my office balcony.
  • Full size residential refrigerator (with battery sine converters for staying cool on the road). Since we live full time in our RV, we need a full refrigerator, not the compact units typically found in RVs.

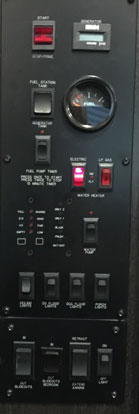
Control panel
One of two main control panels.

In addition, we had them add slide toppers. It was surprising that these were not included standard. Here in Texas, every bit of shade helps, and the roof of the slides is pretty thin and let a lot of heat in otherwise. Unfortunately, when we picked up the unit the slide toppers weren’t installed. So the the good folks at Arbogast RV worked with us and the Heartland factory to arrange to have the toppers shipped to us, and reimburse us when we get them installed.

So now I’m planning out how to automate this beast. I’m super delighted that there are a lot of LED lights in this RV, and most of the lighting controls are contained in 2 large control panels. This should make adding Photon controlled relays much easier and less expensive.

I’ll be blogging my IoT and other projects as I go. Stay tuned…