We had expected to garage wall to come down pretty easy, and for the most part that was correct. My neighbor John recommended that I contact the manufacturer to ask about it. I did so, and was surprised to receive a reply within a day stating that it should be ok. There are no wires, pipes, or structural issues with doing so.
My plan was to remove the door, and then start on the garage side taking the paneling down to see how the wall was constructed. This helped me see where the screws were located.
Upon close inspection, I discovered a problem. The side of the walls are attached to the walls with screws. I could see the screws protruding in from the outside wall, but the screw heads are not visible on the outside walls. So I concluded that the walls were screwed in place before the outside paneling was installed. This made it impossible to remove the screws without removing the outside paneling, which I did not want to do. So I ended up drilling holes around each protruding screw, and then ripping the wood off the wall. This left each screw protruding from the wall. I then used a power grinder to cut each screw off at the wall. I’ll need to apply some sort of trim to hide the cut-off screws.
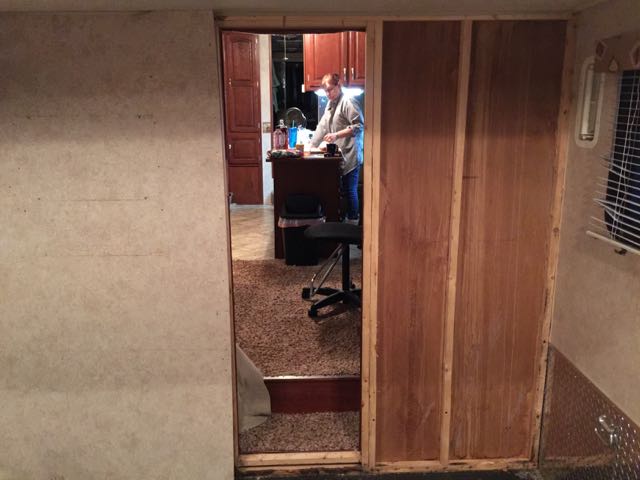
The picture above shows the garage looking from inside the RV. Part of the old wall is leading against the back (tailgate). The grinder used to remove the screws is laying next to where the wall used to be, and next to the step that leads down to the old garage.
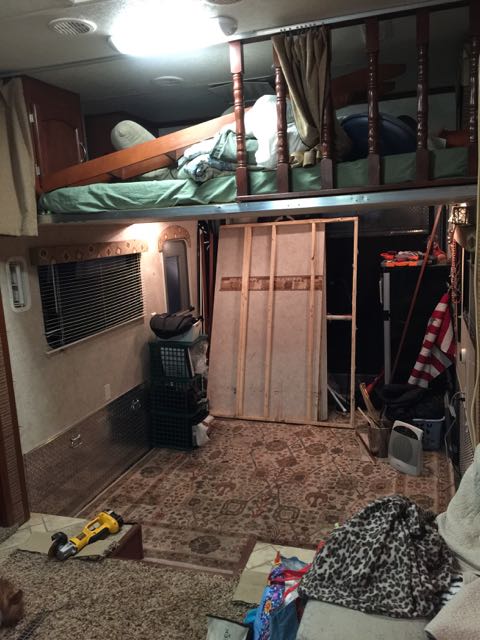
Above the garage is a bed loft. The wall provided a bit of support to the bed, so we’ll need to reinforce it with a post or additional angle iron. We didn’t need to make that decision right away, but eventually decided to make a post that would only be put into place when using the loft. This leaves the space wide open the rest of the time.