Amazon Echo Arrived Today!

Another piece of my RV Automation project arrived today: the Amazon Echo. I’ve gone back and forth about whether to include an Echo in my project. My mind was made up last month though, when I received notification that Amazon was releasing an API to Alexa’s voice interface to developers. So I signed up for the developer program, and upon confirmation, I ordered an Echo.

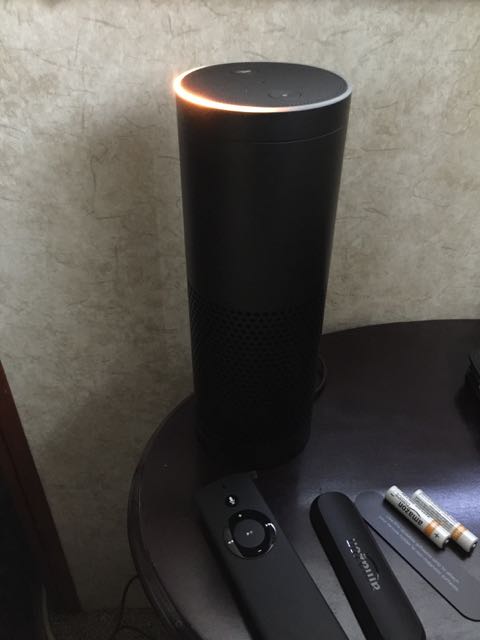
Upon opening the box, I found the Echo, power cord, and remote control. Taking these out of the box, I found a single 2″ x 8″ instruction card that told me to plug it in, and then download the free Echo app. So I plugged-in the Echo, and a blue ring appeared at the top, with a cyan spot rotating around it. About 30 seconds later, the ring turned orange, and I was greeted with a very pleasant “Hello. Your Amazon Echo is ready for setup. Just follow the instructions in your Echo pack.”

Amazon Echo showing blue light ring

So far this is looking pretty good. Packaging is top notch, visual appearance is very modern and attractive, and the sound of Alexa’s voice is very pleasing.

So next I downloaded and installed the Echo app. I was a bit surprised to see that the Echo app only had a rating of 2.5 out of 5 stars. But proceeding on, the app downloaded quickly, then prompted me for my Amazon.com login upon starting. I was then instructed to wait for the orange light ring, and pressed Continue.

Amazon Echo showing orange light ring

I was then instructed to switch my iPhone’s Wi-Fi to connect to the Echo’s Wi-Fi hub (“Amazon-XXX”). Once I did that, Alexa told me it was setup, and to continue in the Echo app.

The app then prompted me for my network name and password. It then confirmed that I’d entered the password correctly, and completed the setup, ending with an introduction video.

The Echo app then walked me through saying a few things to Echo, like “Alexa, what’s the weather” and “Alexa, play It’s a Long Way There by Little River Band.”

I then explored the Echo app, providing information in the Settings pages, and running through Voice Training. This took about 30 minutes total.

Overall, setup was quite painless, and Echo seems to work great. Now my mind is racing on to all the things I’d like to do with it:

  • Control the lights in my RV
    Since my RV runs on 12v, I’m hooking up Arduino’s to control them. But there aren’t off-the-shelf solutions, like there are for normal 120v house lighting. So I’m expecting to need to use the Alexa API to route commands to a web server running on one of the Arduinos with an Ethernet Shield.
  • Control my Home Theatre and Stereo system
    Again, I may need to use the Alexa API to route commands to an Arduino with an IR interface. Someday I may be able to upgrade my TV and stereo to be directly controllable via WiFi or BTLE, but for now I should be able to simulate a universal remote.
  • Voice control my MIDI keyboard setup
    I’d like to be able to start/stop recording while I’m playing piano.
  • Query status of various inputs (temperature, humidity, level) related to my RV
    Even better yet would be to get notified when something is amiss, such as a leaky RV roof seam.

I could probably dream all night about this sort of stuff, but I think I need to pick something and try my hand at using the Alexa API. I’ll report back later my experiences doing so.

RV Automation using LightBlue Bean

I’ve started playing with the LightBlue Bean as a part of my RV Automation project. This $30 part combines a low power, 3.3v Arduino board with Bluetooth LE, several sensors, and an attached 3.3v watch battery. This means that it can be used to do a lot of jobs without any connections whatsoever, and it can talk with an iPhone over BTLE.

I first heard about this part from a github article that my friend Sean wrote. It’s a well written article, fun to read, and I recommend that you read it. Thank you, Sean.

What Can I Do With A LightBlue Bean?

Using Bluetooth

I think the best thing about this part is the built-in blue tooth.

iPhone Connection

I expect the bean to be a bridge from my iPhone to other Arduinos. BTLE makes it very simple to interface to an iOS device using

iBeacon

I may be able to take advantage of the fact that any BTLE device can be configured to act as an iBeacon. This will enable the iPhone app to determine proximity to it. This leads to all sort of automation possibilities:

  • Turning nearby lights on/off
  • Disabling security system when near
  • Unlocking doors

Of course, security will be important, so I’ll have to consider carefully the use of a passcode or some other system to prevent allowing unwanted access if my phone is stolen.

Using the built-in 3 axis accelerometer

The bean also includes a built-in 3 axis accelerometer. This means that it can detect motion in any direction.

Security System

One of the shortcomings of living in an RV is that it moves when walking around inside of it. I’m planning on turning this into an advantage, and use this as a component of my security system.

Leveling

The accelerometer will be used to help me level the RV when parking. Since gravity is indistinguishable from acceleration, it makes a great way to check for level. I’ll need a way to calibrate the level settings after mounting the bean, and I’ll want to convert the accelerator readings from Gs to angle for display on my iPhone.

Door Motion

Another possible application, but one I don’t plan on using at this time, would be to mount the bean to a door. Since it’s battery operated, this could be as simple as just sticking it onto a door.

Using the Temperature Sensor

This is a no-brainer, but does require me to think about where I mount it. Do I want interior or exterior temperature readings?

Using the RBG LED

Status Display

I expect to mount the LED such that it can be used for displaying status of some sort. It can display any color, and be dimmed and/or blinked, allowing for a large range of indications.

Interfacing with Other Arduinos

I expect the bean to be a bridge from my iPhone to other Arduinos using inexpensive RF24 parts. These can be purchased for under $2 each.

Replacing the Battery

I expect to connect it to my RVs 12v system eventually, so I don’t have to keep replacing batteries. This will require a 3.3v regulator. The LD1117v33 is available from Amazon for under $2.

Moving the Booth

After removing the wall, we relocated the booth table and bench seats down into the garage. This required unscrewing the booth from its current location:

Removing the booth


and mounting it into the new location in the garage:

Installing booth in new location


Here it is almost finished. There is still some trim work to do, though.

Booth mounted in garage


With the booth removed from its old location, we then bought a couple inexpensive chairs. We really like the way this change opened up the area.

Chairs where booth used to be

Installing the New Couch

Once the wall was removed, we could move the new couch in through the garage. It came boxed up and wrapped in plastic, so we had to do some unwrapping.

Unpacking the new couch

Once unwrapped, we slipped it into place.

Image of new couch

Removing the Garage Wall

We had expected to garage wall to come down pretty easy, and for the most part that was correct. My neighbor John recommended that I contact the manufacturer to ask about it. I did so, and was surprised to receive a reply within a day stating that it should be ok. There are no wires, pipes, or structural issues with doing so.

My plan was to remove the door, and then start on the garage side taking the paneling down to see how the wall was constructed. This helped me see where the screws were located.

RemovingWall0


Upon close inspection, I discovered a problem. The side of the walls are attached to the walls with screws. I could see the screws protruding in from the outside wall, but the screw heads are not visible on the outside walls. So I concluded that the walls were screwed in place before the outside paneling was installed. This made it impossible to remove the screws without removing the outside paneling, which I did not want to do. So I ended up drilling holes around each protruding screw, and then ripping the wood off the wall. This left each screw protruding from the wall. I then used a power grinder to cut each screw off at the wall. I’ll need to apply some sort of trim to hide the cut-off screws.

Removing the wall 2

The picture above shows the garage looking from inside the RV. Part of the old wall is leading against the back (tailgate). The grinder used to remove the screws is laying next to where the wall used to be, and next to the step that leads down to the old garage.

Above the garage is a bed loft. The wall provided a bit of support to the bed, so we’ll need to reinforce it with a post or additional angle iron. We didn’t need to make that decision right away, but eventually decided to make a post that would only be put into place when using the loft. This leaves the space wide open the rest of the time.

Replacing the couch

Our first step, upon deciding to remove the garage wall, was to go purchase a couch. It didn’t take us long:

New couch

We’ll be picking it up next weekend, once the garage wall has been removed so we can get it in. This unit has a fold down center console, and dual recliners. It will be replacing both the recliner and the sofa. The console doesn’t have power ports, so we’ll be adding those later.

Renovating the RV

My wife and I have been in our current RV for about 2 years now. It is a 2007 KZ New Vision Sportster 41′ toy hauler (41KGx2).We bought it used, so it already had a bit of wear on it. We decided a couple weeks ago to do some major fixing up.

Floor plan of our RV

Note: not shown in the above floor plan is the 2nd door in the garage (storage area), nor the bed loft above it. I’ll be posting some pictures later on.

One of the problems with fixing up an RV is that the doors on an RV are only 24″ wide. We’ve about worn out the current recliner and sofa. But buying a new one was a challenge because of the narrow door width. We had about resigned ourselves to ordering one from an RV company, but then a plan started coming together (don’t you just love that?).

We originally purchased a toy hauler because we liked the idea of being able to take our motorcycle with us. But what really sold us was the idea of using the extra space to expand our living area. So for the past couple years our “garage” has actually been my piano room. We also put a 2nd refrigerator in there, and use it for ironing. It was really nice having the tailgate, because we could easily move big things into it, like the refrigerator.

We had originally thought that the separate garage would provide a mini-apartment for our kids when they visit. This hasn’t happened, though. The kids usually sleep in the fold out couch or loft in the main area. So it occurred to us, why not take down the garage wall, opening up the main area space?

I realize that the main reason for the garage wall is to keep the gasoline smell out of the living area. But we don’t keep the motorcycle in the garage. When we go somewhere, the first thing we do when we get there is to take it out.

Once we started thinking about taking the wall down, we realized that without the wall, we could bring any size furniture into the living room through the tail gate.

And so the project begins. I’ll be posting our progress as we go.

HomeKit

I’ve been playing with Apple’s new HomeKit framework. It attempts to provide a way to integrated all your automated home devices, allowing a single app to control them all. Even better, Siri can be used.

This is still early, so we’ll have to see how it plays out. But you can bet I’m going to be looking at how to use this technology in my RV. I’ll be blogging about it going forward.

Have a Disneyland Day!

Yesterday I had a Disneyland day.

I grew up in Los Angeles. Disneyland was only a 45 minute drive away, so we tended to go quite often; maybe several times a year. So I guess I’ve probably been there about two or three dozen times. The joy of going to Disneyland is permanently etched into my brain. And it evokes very good feelings.

I have very fond memories of entering through the gates, seeing the old fashioned steam train rolling by on a hill covered in flowers spelling out the word Disneyland in bright colors. Then walking up main street USA. The excitement of all the interesting shops and things happening. Old fashioned jalopies and horse drawn wagons drive by. Musicians and Disney characters wander about. Just thinking about it puts me in a great mood.

I was thinking about that while riding my motorcycle into work yesterday. The weather was beautiful. We’ve had a lot of rain, so things are unseasonably green around here. It was a beautiful drive on a beautiful day in a beautiful city. I had to stop while the train went by. The question occurred to me: “Why don’t I feel the same way right now?”

Austin is full of interesting things. I work a block off of Congress, in view of the Capitol building. There are lots of interesting shops all over downtown. People in bicycle rickshaws, amphibious buses, horse drawn carriages, human powered mobile bars, and wandering bands of tourist on seques routinely drive by. And in the evening there is music everywhere.

It occurred to me that there really wasn’t much of a reason to feel less excited about my ride to work than I felt walking through the gates of Disneyland. It was really just a matter of perspective; the result of letting myself fall into a numb routine where I stopped seeing all the beautiful and interesting things in my day to day life. “Going to Disneyland” was like hitting the reset button, and helps me to see things fresh, even those things that I’d seen dozens of times before.

I resolved right then and there to try to see everyday like I was going to Disneyland.

I hope you have yourself a Disneyland day, too!

Lavaca and Bower and Grunt, oh my!

I had a couple weeks off over the holidays. Since we didn’t have any big plans, I wanted to take the opportunity to learn something different. So I chose to dive into learning Lavaca.

Lavaca is a “curated collection of tools” that provides a “web application framework designed to jumpstart development of hybrid and single page applications”. It is available free from Github.

I had really thought that this would be a fairly quick exercise. I’m already familiar with HTML, CSS, JavaScript, jQuery, PHP, and so forth. But I was in for a bit of a surprise. I guess in the past few years that I’ve been focused on learning iOS and native mobile technologies, the face of web development has changed. And it’s changed a lot.

I’m glad to say that the days of throwing together some HTML, CSS, and JavaScript files to create a static website are gone. Websites are now created using real software engineering practices such as build systems, automated testing, dependency management, and formal deployment mechanisms. Sure, one can still throw together some files and upload them using FTP, but why would one want to do so? The good news is that there are powerful, open source tools available to automate and manage the whole process. The bad news (for me) was that there are a bunch of powerful, open source tools that I needed to learn to use. But that’s not really bad news, is it?

I realized that I needed a project to work on. I’ve never been able to learn new things very well unless I could find some way to apply it. So I reached back into my past projects, did some looking around, and found that the Celestino Couture website that I converted to WordPress several years ago hadn’t been updated in about that long. So I contacted Rusty and Sergio and asked if I could use their website as an exercise in learning Lavaca, and with their ok, off I went.

My goal in this exercise is to create a responsive web design that will be easy to maintain and extend over time, and can be deployed natively to Android and iOS devices, as well as the web and other mobile devices.

So I created a test site, and started through the Lavaca Guide, taking side trips to go learn Bower, RequireJS, Node, Grunt, YUIDoc, Dust, LESS, and Jasmine. It’s been fun, and I still have a lot to learn and a lot to do to finish up the new website, but it’s been a great experience. I’m really delighted with what our web team has been doing with Lavaca, and glad to get a better handle on the capabilities of responsive web versus native apps.

So that’s what I did over the holidays. I’ve got to say that it has been a blast! I still have a lot of learning to do, but I’m really enjoying it.